
The following instructions are for applications that allow for a H-header
track(wall mount) and a studded angle track to be mounted flush with an exterior
wall. If you have projections, such as precast sills on openings that
would prevent you from mounting the tracks flush with the wall, a build-out may
be required.

- Required Tools
Electric Drill (Hammer Drill recommend)
4' Level
Extension cord
Pencil
Wing-it (Wing nut driver)
Screw-it i(Sidewalk bolt bit)
Slot Headed Screwdriver
1/4" Steel Drill Bit
3/16" Masonry
5/16" Nut Driver
1/2 Masonry Drill Bit (Combo Drill bit recommended
3/8" Steel Drill Bit
Anchor Set Tool
6' foot ladder
Hammer
25' tape measure
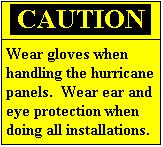
Leather gloves
Hammer
Can of compressed Air
Concrete Block Wall Mount
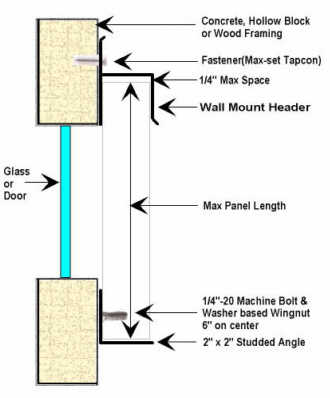
- Drill 1/4" holes in the h-header and Studded Angle tracks not to
exceed 6" on center of the h-header and Studded Angle tracks.
- Place the h-header track 3/4" above the top of the window and center
on the window.
- Level the h-header track and mark one of the 1/4" holes with the pencil.
- Using a 3/16" masonry drill bit, drill a hole approximately 1 3/4"
deep.
- Using the compressed air, blow out dust from hole. Note:
If the dust is not removed prior to driving in the Tapcon, the Tapcon will
not go in all the way. As the screw is driven into the hole, the dust
will be pack to the back of the hole, causing the Tapcon to stop.
- Using a
5/16" head nut driver (attached to a drill), drive in the 1 3/4"
Tapcon. Do not tighten the first screw all the way in.
- Using your
level, level the h-header and drill the second hole. Repeat step 5 (preparing
hole) and securely drive the Tapcon into the wall.. Be careful not to
strip out the Tapcon or tear off the head.
- Drill out
the remaining holes and secure with Tapcon screws. For long tracks,
continually check to make sure the h-header remains level.
- Once the
h-header is secure, place your level vertically on the left or right hand
side of the h-header track. Mark a small vertical line (1/4") below the
bottom of the window. Using this mark will enable you to center the
Studded Angle track. An alternative method would be to center the Studded
Angle track under the window.
- Using the
hurricane panel for the appropriate window, insert the panel into the
h-header and push the panel all the way into the top. Take you studded
Angle track and place it underneath the inserted panel. Make sure the
hurricane panel is tightly in place and the Studded Angle track is lined up
with the mark in step 9. Level the track and mark one of the 1/4"
holes with a pencil..
- Remove
hurricane panel and Studded Angle. Using the 3/16" masonry bit,
drill a hole 1/4" below the mark.
- Insert the
Tapcon through the 1/4" hole in the Studded Angle and fasten the track
to the wall. Level the Studded Angle and drill out the remaining holes
and screw in the Tapcons (Step 5)
- Insert
hurricane panel to check the fits. The panels should fit tightly into the tracks with
only a 1/4" play at the top..
